Creating An Approval
Overview
Approvals are a very common step in Service Portal workflows. The Default Workflow provided with the Service Portal Solution allows Service Owners to add a single approval step (either a Manager, Individual, or Team Approval) to their Service without creating any custom workflow processes. More complicated service workflows however may require multiple approvals, or other processing to take place. This article outlines how to add an approval step generically to any workflow.
Adding an Approval Step
Before adding an approval step to your workflow, first ensure that you have your service configured to use a Custom Workflow and navigate to that workflow in the Task Builder.
To create a new approval step in your workflow, add the KD Route Approval task from the task list in the builder:

You can do this by:
- Clicking and dragging this task into your tree
- Connecting the newly created task to a previous task node
- Double clicking the step to fill out the parameters
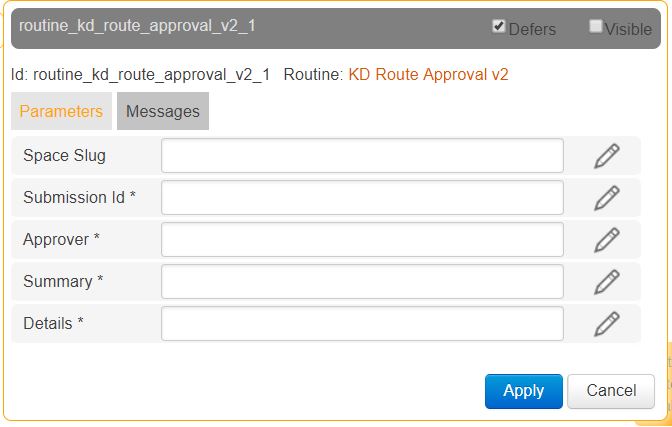
The required parameters are marked with a red star.
- The submission Id is the Id of the submission (request) that is being approved.
- Approver here should be a user's id, a team name, the word "Manager".
- Summary and Details will appear in the approval for the approver.
If you don't remember when filling out the parameters, if you hover over the parameters, they will pop-up notes about what they each are, eg.

Before clicking Apply, double click the gray area above the parameter list and give this step a name that makes sense.

Adding the KD Route Approval node will route an approval to the desired individual using the approval form listed in the Approval Form attribute for that Service. To use a different form, you can use any of the other approval routines shown below:

These work the same way but they require different parameters based on the type selected:
- KD Individual Approval (Sends an approval to a specific User)
- KD Team Approval (Sends an approval to a specific Team)
- KD Manager Approval (Sends an approval to the users manager which configured as an Attribute on the User)
Each of these approval tasks also requires you to enter the Approval Form Slug parameter (the slug of the form within Queue that should be used for this approval) and the Days Due parameter (the number of days until this approval is due) as well.
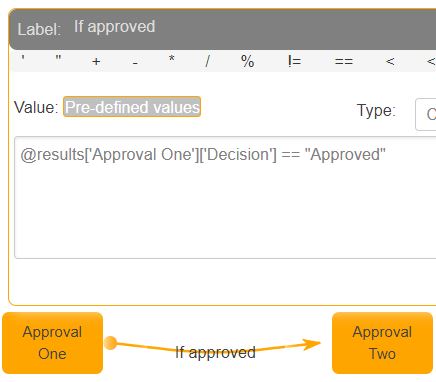
Once the approval has been configured and connected into your workflow. It will provide output of the following once completed (approved or denied by the approver):
- Decision
- Denial Reason
- Notes for Customer
- Approver Id
- Approval Submission Id
- Fields JSON
You can use the Decision to determine if you should continue or not.
Updated 8 months ago