Kinetic Agent
Agent Overview
The Kinetic Agent is a lightweight web application that provides a way to integrate systems across network boundaries securely with the Kinetic Platform, allowing simple and secure connections between customer enterprise LANs and Kinetic's hosted solution. The Agent is capable of running all Kinetic Platform plugins (including bridge adapters, file adapters, and task handlers) independently from where the Kinetic Platform is hosted, enabling hybrid-cloud integrations for solutions built on the Platform.
How it Works
The Kinetic Agent is typically installed onto a web server (or a series of web servers for high availability) within a DMZ. A firewall rule allowing inbound traffic from the remote Kinetic Platform instance to access the Agent over HTTP(S) is then created. Then, for each integration required, network policies are configured between the DMZ and the local network.

Security Considerations
By default, the Agent is configured not to allow remote upload of any plugins (untrusted code). This enables local security teams and administrators to scan and install only trusted plugins that are required for an implementation.
Kinetic plugins typically require the connection information for the connecting resource (server address, username, password, and so on) after being installed. All connection information persists locally within the Agent’s environment.
Remote administration of the Agent from within the Space Administration Interface of the Kinetic Platform is secured using a shared secret that is configured when the Agent is installed. This secret can be rotated using blue-green deployments on a regular basis in-line with local security standards.
Installation
Prerequisites
Hardware Requirements
The Kinetic Agent can be optionally configured for high availability. If this is a requirement, a minimum of 2 Web Servers will be needed along with a load balancer coordinating traffic between them.
| Usage Pattern | Description | Concurrent Requests | # of Servers | RAM (GB) | Free Storage (GB) | Cores |
|---|---|---|---|---|---|---|
| Development | lightweight | < 100 | 1 | 2 | 5 | 1 |
| Single Solution | Load balanced, medium usage | 100 - 1,000 | 2 | 4 | 5 | 2 |
| Enterprise Wide | Load balanced, high usage | > 1,000 | 3+ | 8 | 5 | 4 |
Load Balancer
Kinetic Data recommends that all production environments be configured with more than one Kinetic Agent for redundancy. A load balancer will need to be configured according to your company security standards to distribute traffic between each Kinetic Agent web server.
Software Requirements
Apache Tomcat
The Kinetic Agent requires a Web Server configured with Apache Tomcat version 8 or later. Instructions for installing Apache Tomcat and it’s dependencies can be found at https://tomcat.apache.org/
Plugin Specific Software Requirements
In some rare cases, plugins require additional software to be installed on the server. Examples include plugins that make direct command line calls. See plugin documentation for specific plugin software requirements.
Network Requirements
Network Requirements
Firewall Rules
A firewall rule will need to be created allowing traffic from the Kinetic Platform to whatever port the Kinetic Agent is running on. It is strongly recommended that the server hosting the Kinetic Agent be configured using SSL.
If the Kinetic Platform is hosted by Kinetic Data on kinops.io, the following IP addresses should be allowed for inbound/outbound traffic:
- 52.22.66.56
- 174.129.162.107
- 3.211.40.196
- 3.216.128.34
- 18.232.11.239
Additional network rules may need to be configured between the Kinetic Agent(s) running in the DMZ and services running within the Enterprise LAN that are being added as integrations within the Kinetic Platform.
Network/Shared Drive
If multiple Kinetic Agent web servers are required for high availability or capacity, a network drive will need to be provisioned on each Kinetic Agent web server to coordinate configuration changes between each Agent host.
Install Procedure
Configuration Variables
The Kinetic Agent requires two configuration variables to run securely and reliably. These variables can be set via java system properties, or environment variables on the server. Be sure to restart the Tomcat web server after making any configuration variable changes and before continuing with the installation.
Data Directory
The Data Directory is the location that contains all plugins and plugin configurations. By default, this directory is located within the Kinetic Agent web application /webapps/WEB-INF/config, however it is strongly recommended (and required if running multiple Agents) that this directory be set to a location outside of the Tomcat context.
If multiple Kinetic Agent web servers are being configured, this data directory should be set to the Network/Shared drive that was provisioned with the web server. The Data Directory can be set one of the following two ways:
| Setting the Kinetic Agent Data Directory | ||
|---|---|---|
| Java Option | -Dcom.kineticdata.agent.env.KINETIC_AGENT_DATA_DIRECTORY=<LOCATION> | |
| Environment Variable | KINETIC_AGENT_DATA_DIRECTORY=<LOCATION> | |
Signing Secret
The Kinetic Agent uses a pre-shared secret to encrypt management and plugin execution traffic between the Kinetic Platform and the locally-installed agent. The Signing Secret can be a list of comma separated values to enable highly available blue-green rotation of secrets.
| Setting the Kinetic Agent Signing Secret | ||
|---|---|---|
| Java Option | -Dcom.kineticdata.agent.env.KINETIC_AGENT_SIGNING_SECRETS=<COMMA SEPARATED LIST OF SECRETS> | |
| Environment Variable | KINETIC_AGENT_SIGNING_SECRETS=lt;COMMA SEPARATED LIST OF SECRETS> | |
Configurator Username/Password
The Kinetic Agent provides an admin interface for locally managing plugins configured within the Kinetic Agent. This admin interface is secured using a Configurator Username/Password that should be set using the following instructions.
| Setting the Kinetic Agent Configurator Username/Password | ||
|---|---|---|
| Java Option | -Dcom.kineticdata.agent.env.KINETIC_AGENT_CONFIGURATOR_USERNAME=<USERNAME> -Dcom.kineticdata.agent.env.KINETIC_AGENT_CONFIGURATOR_PASSWORD=<PASSWORD> |
|
| Environment Variable | KINETIC_AGENT_CONFIGURATOR_USERNAME=<USERNAME> KINETIC_AGENT_CONFIGURATOR_PASSWORD=<PASSWORD> |
|
Copy Software Package to Server
After downloading the Kinetic Agent, unzip it and place the kinetic-agent.war file into the /webapps directory on each Kinetic Agent Web server. Within a few seconds (or after restarting Tomcat if auto-deployment is disabled in your Tomcat configuration) you should be able to access the Kinetic Agent web server by navigating the Tomcat Web Server using the kinetic-agent context (ie, https://webserver.acme.com/kinetic-agent) and logging in using the configurator username and password set in the previous step.
Post Installation
Connecting the Agent to a Space
Once the Kinetic Agent has been installed, it can be configured for use within a Kinetic Platform Space.
- Login to the Kinetic Platform Administration Console, and navigate to Space > Settings > Platform Components > Agents
- Click “Add Agent” and provide the required information
a. Agent Slug: An arbitrary identifier for the agent
b. Agent URL: The URL to the local agent or load balancer (if multiple Agents were installed)
c. Agent Secret: The Signing Secret configured in the Installation Step - After hitting “Save”, from the Agent List view click the check box next to the newly configured agent to verify connectivity.

Configuring the Agent for Handler Execution
In order to execute Handler Plugins using the Kinetic Agent they will need to be downloaded and placed inside the Data Directory within the Kinetic Agent and then configured with connection information.
Download and Import Handlers
The first step for Hander usage within the Kinetic Agent is to download or package any relevant handlers to one of the Kinetic Agent servers.
First, Create a folder called “handlers” within the data directory that was configured in the Procedure section of the Agent install guide. The handlers folder should be a peer/sibling to logs, temp, config as seen in the image below.

Next, place any handlers that need to be added to the Agent inside the newly created handlers directory as seen in the image below. The handlers must be extracted/unzipped before moving them to this location.

Finally, restart Tomcat on each Kinetic Agent web server to pick up the newly added handlers.
Configure an Integration User
A user must be created within the Kinetic Platform to authenticate the “Agent Handler Execute” handler (configured in the next step). The integration user must be a spaceAdmin. It is best practice for each Agent to have its own integration user.
Configure the “Agent Handler Execute” handler
In order to execute a Handler installed on a local Agent, a handler within the Kinetic Platform’s Workflow system must be configured to call the local Agent.
First, download the kinetic_agent_handler_execute_v3 handler and upload it using the Kinetic Space Administration Consoles by navigating to Space > Plugins > Handlers and clicking the “Import Handler” button.

Next, Configure the kinetic_agent_handler_execute connection information by clicking on the newly imported Handler. The connection details include:
- api_server: The Kinetic Platform URL (ie: https://my-space.kinetic-platform-location.com)
- api_username: The integration user username set in the previous step
- api_password: The integration user password set in the previous step
Additionally, add the Handler to a category so that it becomes visible within the Workflow Builder.

Usage
Using an Agent Handler
Configure Agent Handler Instance
Navigate to the Kinetic Platform Space Administration
Consoles and click Space > Plugins > Agent Handlers.
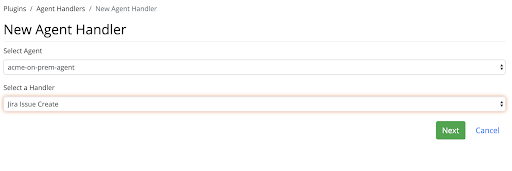
Then, click the “New Agent Handler” button to begin configuring a handler that was installed on the local Agent. You will be prompted to select which Agent you would like to use to configure the handler as well as which handler you’d like to configure (a list of handlers that have been installed on the local Agent will be displayed in the Select a Handler dropdown).
Clicking “Next” will prompt for any configuration information that the agent handler requires. This is typically connection information like api location, username and password.
Test Agent Handler Connection Information
After configuring an Agent Handler, it can be tested by clicking into the Handler from Space > Plugins > Agent Handlers (make sure this list is filtered by the correct agent-slug)
From this page, you can click the “Test” link of the page to provide example parameter values and ensure connectivity and results. It’s helpful to jot down the names of the parameters displayed on this “Test” tab as they will be needed in a future step when configuring a workflow to execute this handler.
Configure Agent Handler Execute node within a Workflow
Execution of Agent Handlers can be initiated from workflows on the Kinetic Platform. To call an Agent Handler, the 'kinetic_agent_handler_execute' handler must be configured inside of a workflow process.
- Open the workflow builder using a new or existing Tree or Routine that you would like to call an Agent Handler from
- Click the + button to add a new task to the workflow and search for the “Kinetic Agent Handler Execute” handler (if the handler isn’t in the list, make sure it was put into a category in the “Configure the “Agent Handler Execute” step
- After giving the node a name, configure its parameters as follows:
a. Agent Slug: the slug of the agent configured in the Connecting the Agent to a Space step
b. Handler Slug: the slug of the handler configured in the Configure Agent Handler Instance step
c. Parameters: a JSON map of the parameters and their values. The parameter keys can be found on the Test tab of the Agent Handlers setup page as described in Test Agent Handler Connection Information.
After the Agent Handler Execute node has been configured, the tree or routine is ready to be run and tested.
Configuring an Agent Bridge
Agent Bridges are configured the same way as “system” configured bridges. Within the Space Administration Consoles, navigate to Space > Plugins > Bridges. Click “New Bridge” and then choose the appropriate Agent and Adapter Class. The subsequent setup pages are the same as configuring any “system” bridges.

Once a Bridge Adapter instance has been configured, a Model can be associated by creating a new Model, or modifying an existing one and selecting the appropriate Agent Slug and configured Bridge Slug as configured in the previous step.

Administration
Rotating Agent Secrets
Kinetic Agent Administrators can rotate the pre-shared Agent secret to conform to corporate security best practices. To rotate a secret, the following steps should be taken.
- Log onto the server(s) that is hosting the local Kinetic Agent instance
- Append a new Signing Secret appended to the existing one, separated by a comma
- Restart Tomcat to pick up the new Signing Secret
- Update the Agent Platform Component by following the steps in the 'Connecting the Agent to a Space' section of this guide
After validating the connection, remove the previous Signing Secret and restart Tomcat
Logging
Log Files can be found by navigating to the Data Directory location and then choosing the logs folder on the Agent Server.
Updated about 2 months ago