Using Bridged Resources in Forms
Overview
While some forms are self-contained, most need some way to interact with other systems and applications. The Form Builder uses bridges, bridge models, and bridged resources to retrieve and present information from other sources.
Process
Before adding a bridged resource to a form, the bridge information must be configured in a bridge model. Once that's done, follow these steps to add a bridged resource to your form:
- From the Platform console, open the Form Builder for the form to which you want to add a bridged resource. The Form Settings are displayed automatically.
- Expand the Bridged Resources section and click Add Bridged Resource.
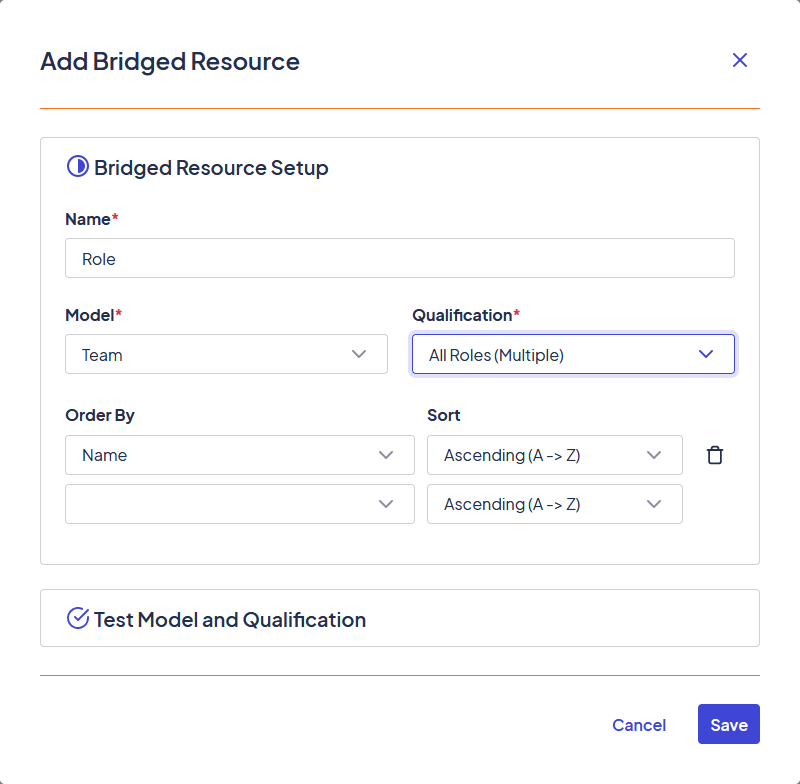
- Enter the following information for the bridged resource:
- Name: Enter a name that describes the bridged resource.
- Model: Select the model that contains the data you want to display.
- Qualification: Select the qualification to query the specific information you want to display.
- Order By: If the model and data can return multiple results, you can specify the order they appear in.
- Parameters: Enter the parameters, if any, you need to pass information to the qualification.
- Optionally, click Test Model and Qualification. This lets you verify that the bridged resource returns the information you want before saving your form changes.
Example
Let's say we want to develop a form to invite new users to our client-side portal and ask them to indicate their role at the company as part of the account creation process. Rather than using a free-text field (which could result in inconsistent answers from users describing the same role differently), we could use a bridged resource that gives users a specified list of roles to choose from. In the example below, we'll use the Person model to obtain this list.
Updated 9 months ago